Starting vegetable seeds indoors is fairly easy to accomplish, even for a beginner gardener. Expensive seed-starting equipment isn’t required, although a few extra items can improve your home seed-starting results.
Gather Your Supplies
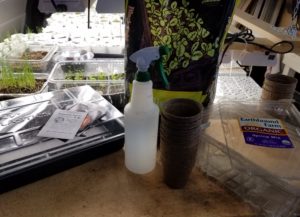
A good quality seed starting mix, a few peat pots or other growing containers, a spray bottle, and seeds is all you need to get started!
Here’s a list of the basic supplies you’ll needed to get started:
- Seeds (see Part 1 for varieties to start indoors)
- Good quality seed-starting mix
- Clean growing containers
- Clear covers for containers (lids or plastic wrap)
- Spray bottle for water
- Bright light (natural or artificial)
- Optional items: Grow lights or a LED shop lights, plant heat mat.
The Dirt on Soil & Fertilizer for Seed Starting
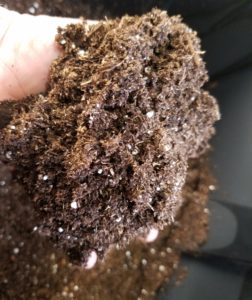
A good quality seed mix is light and fluffy. Moisten the mix with a cup or two of water a few days before planting. Avoid soaking the medium.
For optimum seed germination use a good quality seed-starting mix. Commercial mixes are generally a combination of sphagnum peat moss mixed with perlite or vermiculite. Some may contain wetting agents for moisture control. Typically an 8 to 10-quart bag of seed-starting mix will provide you with enough medium for dozens of 3-inch pots.
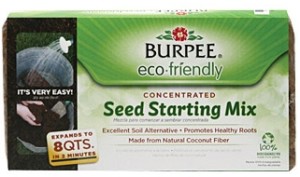
Coconut coir (fiber) is an eco-friendly substitute for peat moss. It’s usually sold in solid blocks and is reconstituted with water.
You can also create your own seed starting mix by combining two parts good quality compost with two parts peat or coconut coir and one part perlite. The recipe is based on volume, so it doesn’t matter what you use to measure the ingredients, as long as you are consistent.
Soil from your garden should never be used – it’s too heavy and it won’t drain well (not to mention it’s most likely still frozen in your garden bed). Another no-no is fertilizer – either added to the mix or added when the seeds emerge. Nature packs seeds with all the nutrients they need to get started – no extra nutrients are needed at this stage!
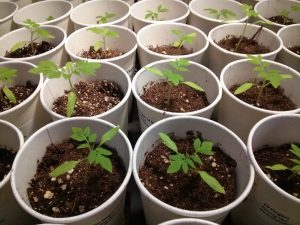
Once seedlings have their first true leaves they can be transplanted into a larger growing container. Here tomato seedlings are growing happily in recyclable paper cups.
Once the first set of true leaves appear on the seedlings, they should be transplanted into a larger growing container filled with good quality potting soil. A slow-release organic fertilizer, such as fish emulsion – diluted to a weak solution (read and follow the instructions!!) – can be applied about 2 to 4 weeks after the seedlings have been transplanted into larger containers.
Growing Containers
You can start seeds in just about any type of container – as long as it’s clean and sterilized, has good drainage, and it is size-appropriate for the seed. To sterilize, use a solution of 1 part bleach to 9 parts water; scrub the container and rinse thoroughly.
The most common commercial containers are growing trays, known as 1020 trays or “flats” (with or without cubical inserts) and 3-inch peat pots. There’s a good chance you have all the growing containers you’ll need in your house at this moment: milk cartons (plastic or coated paper), yogurt cups/containers, egg cartons, and even rolled-up newspapers. I use a combination of 1020 trays with inserts and 3-inch peat pots inside plastic lettuce containers – both work equally well.
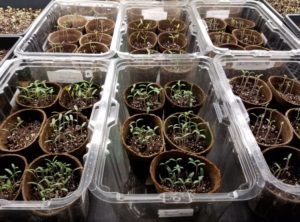
Plastic produce containers make perfect mini-greenhouses. Once the seedlings emerge, the container lid can be removed.
The Greenhouse Effect: Seeds need a warm, moist environment to germinate, so you’ll want to create a “greenhouse” effect within your growing containers. This can be easily accomplished with plastic wrap, plastic bags, or my personal favorite – plastic produce containers with lids (like a spinach or lettuce container). Any waterproof container that is deep enough to hold your pots with a little head room will work.
Nestle the pots in the container, pop on the lid, and viola, a perfect mini-greenhouse. No lid? No problem. Stretch a piece of plastic wrap, or a plastic bag over the top and secure with a large rubber band. The lid/cover is only needed until the seeds germinate, then it can be removed.
You can also purchase seed-starting kits that include trays and clear plastic lids, or buy these items individually. They are widely available online and locally where seed starting supplies are sold.
The Heat is On (for Germination)
Seeds need warm air and soil to germinate and should be started in a location that is at least 65 to 68 degrees. Soil temperature also plays a big role in how quickly your seeds will germinate.
It’s a good idea to warm up your starting mix before planting. This doesn’t require anything more than storing the mix in a warm location for a few days before planting. The goal is to just to bring the mix up to the ambient temperature of your home. Your seeds will appreciate it!
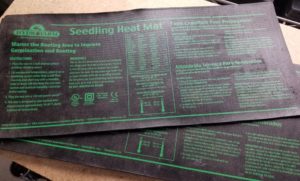
Another useful tool to help with seed germination is a plant heat mat. While it’s not required, you will have better and faster germination results when using one. For example, tomatoes will germinate in about 6 days when the soil temperature is between 77 and 85 degrees. Drop the temperature down to 68 and it will take 8 days. With the soil at 60 degrees, it will take almost two weeks for tomato seeds to germinate.
Plant heat mats come in various sizes (1-flat to 4-flat size), and some have thermostats that allow you to control the heat. Those without heat controls generally increase the temperature of the root zone by 10 to 20 degrees above the ambient temperature.
Soil Temperature for Vegetable Seed Germination
| Crop | Minimum (F) | Optimum Range | Maximum |
| Cabbage | 40 | 60 – 85 | 95 |
| Eggplant | 60 | 75 – 85 | 95 |
| Peppers | 60 | 65 – 75 | 95 |
| Pumpkin | 60 | 85 – 95 | 105 |
| Squash | 60 | 85 – 95 | 105 |
| Tomatoes | 50 | 65 – 85 | 95 |
| Watermelon | 60 | 75 – 95 | 105 |
Table Adapted from: California Master Gardener Handbook, 2nd Edition. University of California.
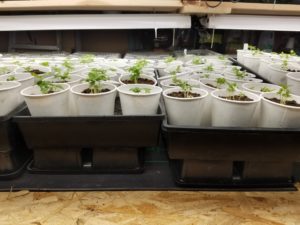
Flats of basil are raised off the heat mat by placing them on top of another growing container. The mat continues to provide an indirect heat source for these tender plants.
Once seeds germinate, remove the growing containers off of the mat (you don’t want to “cook” the roots – these are words of experience!!).
If you are growing in a cooler environment, you can raise the container off of the mat by a few inches (use wood blocks or place containers on upturned containers) to remove the roots from direct heat. This will provide indirect warmth to the seedlings. All plants should be removed from the heat by the time the first true set of leaves emerge.
Under the Sun (or Shop Light)
Seeds started indoors need bright light — in fact they need at least 12 to 16 hours of light each day. If you are only starting a few plants from seed, you may be able to get away with growing in a sunny window. However, this may not provide enough light and your seedlings may become extremely leggy (and flop over) as the stretch to get light.
A better option is to use bright, artificial light such as grow lights or simple fluorescent or LED shop lights. Most retailers that sell seed starting supplies will have a variety of grow-light options, from table-top lights (perfect for a few containers of seeds) to larger grow-light systems. You can also use regular fluorescent shop lights — either T-5 bulbs or LEDs. Setting the lights on a timer makes it easy to control.
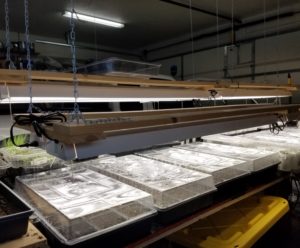
Grow lights can be hung with chain to raise or lower as needed. Here peppers are germinating with lights a few inches above them.
Our indoor growing area in the garage consists of a bank 12 cool white LED lights on a wooden frame. The lights can be lowered during the growing period and raised to the ceiling when not in use. Our system is on a timer that comes on at 6 am and turns off at 8 pm. These lights were purchased at Costco (Feit Electric: 4000K, 3700 lumens) and have worked great over the last 4 years.
Seed Starting Racks: If you are starting out small, a table in your house with a single grow light (or that sunny window) should meet your seedling’s light needs. If you’re more adventurous and are planning to grow multiple flats of seeds, you might consider a seed starting rack. These can be purchased or you can make your own by using metal wire shelving and LED lights (for a lot less, too!).
Seed Starting Basics & Best Practices: The “How-To”
-
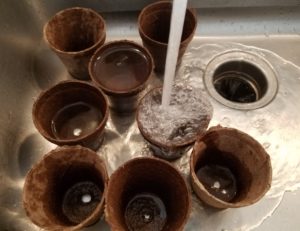
A few days before planting, bring the seed mix in the house or place it on a plant heat mat to it warm up. Once it is at ambient temperature place your warmed mix in a plastic tub or bucket and moisten with warm water. A cup or two is all that you need for 8 to 10 quarts of mix. You don’t want the mix “wet,” just slightly moist. The soil should be at least 68 degrees for good germination. Never plant your seeds in cold, wet soil! Brrrr!! - If you are using peat pots, saturate them with warm water before filling with starting mix. This avoids moisture wicking from the mix to the peat pots.
-

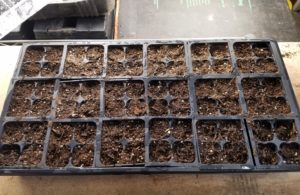
Fill the tray’s inserts with soil and gently press into each cubicle. Place seeds on top, mist with water, cover with a fine layer of soil, and gently mist again.
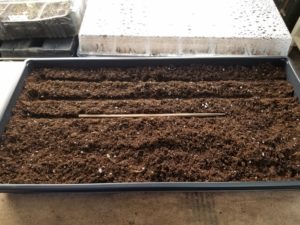
Fill growing containers about an inch to half-inch from the top with seed-starting mix. Lightly press the soil down – you don’t have to compact it. If you are using trays without planting inserts, create shallow “rows” with a chopstick or pencil.
- Using a spray bottle with warm water, lightly spritz the soil before planting the seeds – this little trick helps the seed to “stick” to the soil (achieve good seed-to-soil contact).
- Sow your seeds following the spacing recommendations on the seed packet. This may need to be slightly modified due to the growing container.
The point is not to crowd the seedling and provide to enough room to dig out seedlings for transplanting later into larger containers.
- Spray the seeds with warm water just to dampen.
- Cover the seeds with a fine layer of seed-starting mix and spray the soil again. Some very small seeds don’t need to be covered with soil. Check the seed packet for sowing recommendations.
- Cover the container with a clear lid (plastic wrap/bag) and place in a warm location or on a heat mat.
- Once the seeds germinate, remove the clear cover and remove the container from the mat (if using). Place the seedling under a grow light or near a sunny window.
-

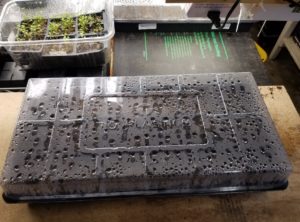
A heat mat and humidity dome greatly improve germination. Once seeds germinate, remove the dome and the container from the heat mat.
Monitor moisture levels daily – the planting mix should remain slightly moist to dry – not wet. Wet, soggy soil can cause “dampening off,” which is a deadly fungal infection.
- When your seedlings have their first true set of leaves, transplant the strongest seedlings into individual growing containers filled with a good quality potting soil. I find using a serrated grapefruit spoon and a chopstick very useful for transplanting seedlings.
- Continue to monitor water levels and avoid over-watering. It’s better to have dry soil than soggy soil. A weak solution of organic fish emulsion can be used to fertilize the seedlings a few weeks after transplanting (read and follow the instructions on the fertilizer container!!).
- Make sure to harden off your seedlings before transplanting into the garden (see Part 1).
As it is with gardening in general, starting vegetables from seed can be an exercise in trial and error – sometimes things work, sometimes they don’t. You will need to experiment to find out what works best for your environment. I recommend starting out small with a couple of containers of your favorite veggies and grow from there!
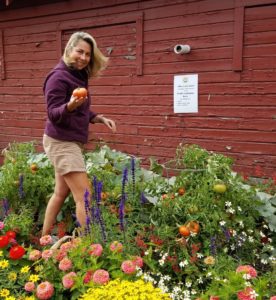
Harvesting Sasha Altai heirloom tomatoes started from seed at the Master Gardener’s Pollination Garden at the Kootenai County Fairgrounds.
With a little practice (trial and error!), you will soon be stocking your vegetable garden with plants that you started from seed…and harvesting the fruits of your labor. What a sweet reward!
If you have seed-starting questions just comment below or contact me here!


Thank you so much for the motivation! Let me clarify, I can use a regular shop light with LED bulbs for the light source? Thanks so much.
Hi Jenna,
Yes, you can use regular shop lights — either fluorescent or LED. We use bright white LEDs (4000 kelvins) with 3700 lumens. These have worked really well for us. We purchased these as Costco — not sure if they still have them, but they seem to get them in a few times per year. They are linkable — meaning you can plug in two sets together. You’ll want to keep lights on your seedlings for 12 to 16 hours per day — a timer works great for this. And, you also want to place the lights a couple of inches above the seedlings (this is why LEDs are great — they don’t put out heat that can scorch seedlings). As your seedlings grow, you can raise up the lights. If your light won’t go that low, then raise your seeds up to within a couple of inches of the light source. Hope this helps ~ thanks for reading and good luck with your seed starting! — Candace
Thank you for the response! I have the same lights from Costco. Gotta love Costco. Thank you for the motivation. I’ll be starting my seed tomorrow.
Hi! I am new to the area (originally from Florida) I was wondering what vegetable varieties do best in this climate, or which ones you have had the most success with!
Hi Emily, Welcome to north Idaho! Our growing climate is very different than Florida, as you probably already know! If you hop over to my Shop page (https://thecoeurdalenecoop.com/shop), you will find many vegetable varieties that excel in our climate. I only sell heirloom and open pollinated plants that are well suited for our local growing conditions. I can highly recommend Sasha’s Altai and Large Barred Boar for early and delicious tomato varieties. Because our frost free growing window is only 120 days, I recommend selecting plant varieties that have a “days to maturity” of 90 days or less. These have the best chance of producing a harvest before the fall frost hits. Thanks for reaching out — all the best in your gardening endeavors. — Candace