Harvesting Garlic at the Chicken Ranch
This week the garden took on the faint aroma of an Italian kitchen with the sweet smell of garlic, onions and basil swirling around on the breeze. Yes, it was time to harvest the Spanish Roja Garlic and Walla Walla sweet onions.
This was our first (successful) year at growing garlic. Last October we planted about 50 cloves of Spanish Roja – a purple streaked, hardneck heirloom variety know for its true garlic taste. The cloves set good roots last fall and overwintered under a bed of straw. The plants grew rigorously and I was delighted by the bounty of beautiful garlic scapes cut earlier this summer.
Harvesting garlic is a bit different than harvesting onions. You might not think that since they are both from the allium family, but they differ in the timing of the harvest and the curing or drying process. Onions are ready to harvest when their tops die back. Often they are left to dry on top of the soil in the sun for a day or so before being moved to a shady, ventilated area to continue to dry.
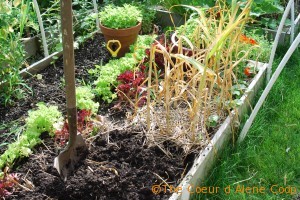
Garlic is a bit different. You’re getting close to harvest time when the leaves start to brown, but there are still a few green leaves present. That’s the time to stop watering. Well, if you can. Our garlic was planted in a bed next to the sprinkler that waters half the garden. This didn’t appear to cause any problems to the bulbs, but I can see how less water would help in the curing; and let’s face it, dry dirt cleans off better than a muddy clump!
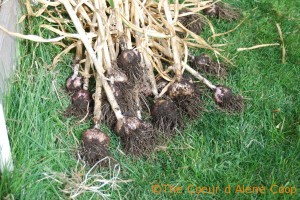
Where onions seem to just pop out of the ground with little effort, garlic requires a fork or shovel to loosen the earth. Whatever you do, don’t be tempted to pull garlic out by the stalk. It’s deep in the ground and sets very tight roots — you won’t easily unearth it by pulling. I used a shovel but was very careful not to get too close to the bulbs when digging and lifting the ground.
Curing Garlic
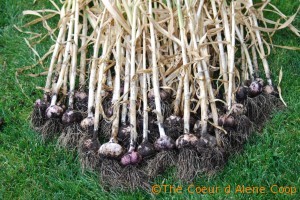
Once harvested, gently brush off any loose dirt from the skin and roots (I bet this is a lot easier to do when that dirt is actually “loose” and not mud). Unlike onions, garlic should not be put in direct sunlight to cure, as this can change the flavor.
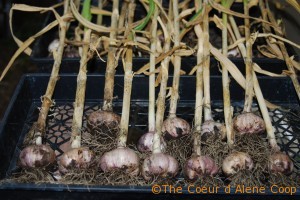
Find a dry, well ventilated spot to cure your garlic, like a garage, porch or shady spot in the yard. Our garlic is drying under the shade of the walnut tree, in mesh bottom plant trays which allow air to circulate around the bulbs. A screen or wire mesh would work well too. Don’t crowd the bulbs, you’ll want air to circulate all around. Let your garlic cure for 3 to 4 weeks, then you can braid the stalks or cut them short and store them in a cool, dry place. I’ll keep some in the pantry, but most will hang in the garage in mesh produce bags.
I’ve already picked out the bulbs that are going to be “seed” for next year’s crop. I’ve selected four of the biggest bulbs and will plant the largest cloves from each. Come October these will go back in the ground, but in the far corner bed where the sprinkler doesn’t quite reach.
Now, back to the waiting game for the tomatoes…
How’s your garden growing this summer? I’d love to hear about it. Share your thoughts in the comments below!


Leave a Reply