Garlic is one of the easiest vegetable crops to grow and is relatively free from disease and insect infestations. In fact, garlic is often used as a companion plant to help ward off insects like aphids, fungus gnats, cabbage loopers, and Japanese beetles and even larger pests like rabbits and deer.
Not sure what type of garlic to plant? Read Garlic Types to Grow in the Home Garden here!
Plant Garlic in the Fall
When growing garlic, timing is everything. For most regions in the U.S., it is planted in the fall, from late-September to mid-October, and is harvested the following summer. The reason for fall planting is that garlic needs a cold period of at least 40˚F for 4 to 8 weeks.
Planting in early fall allows the garlic clove to develop roots and establish itself before the ground freezes. By spring, tender shoots will start to emerge from the soil.
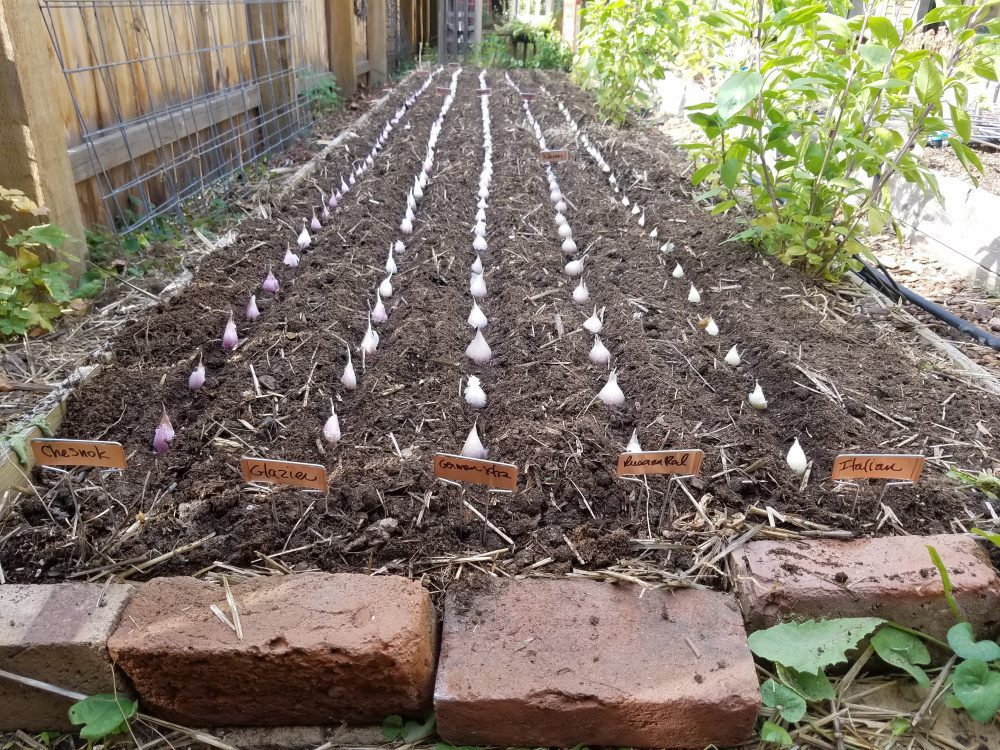
Planting garlic is much like planting fall flower bulbs, with one exception – you need to separate the individual cloves from the garlic head so each clove will develop into a bulb.
How to Grow Garlic
Garlic likes full sun, so select a location that gets at least 6 hours of sunlight per day. Keep in mind that the position of the sun in fall is not the same as it is in the spring and summer, so be aware of any trees or other obstacles that could block out sunlight.
Garlic grows best in fertile, loamy soil. It doesn’t compete well with weeds so clear your growing location of any weeds and also debris. Add a 2-inch layer of quality compost to the soil and lightly work it in or just leave it on top to work itself in over the winter.
Garlic doesn’t require much space to grow and you can easily plant up to 72 cloves in a 4-foot square raised bed. Mark your planting rows about 6 to 8 inches apart and plant individual cloves — pointy end up — about 3 to 4 inches deep, leaving about 4 to 6 inches between each clove.
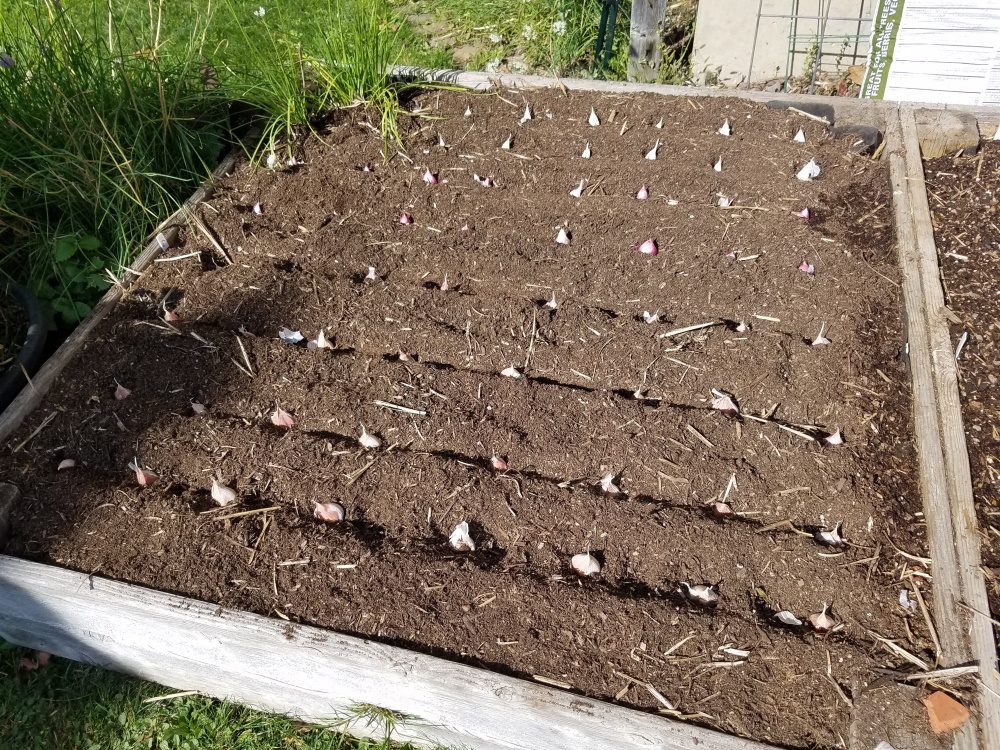
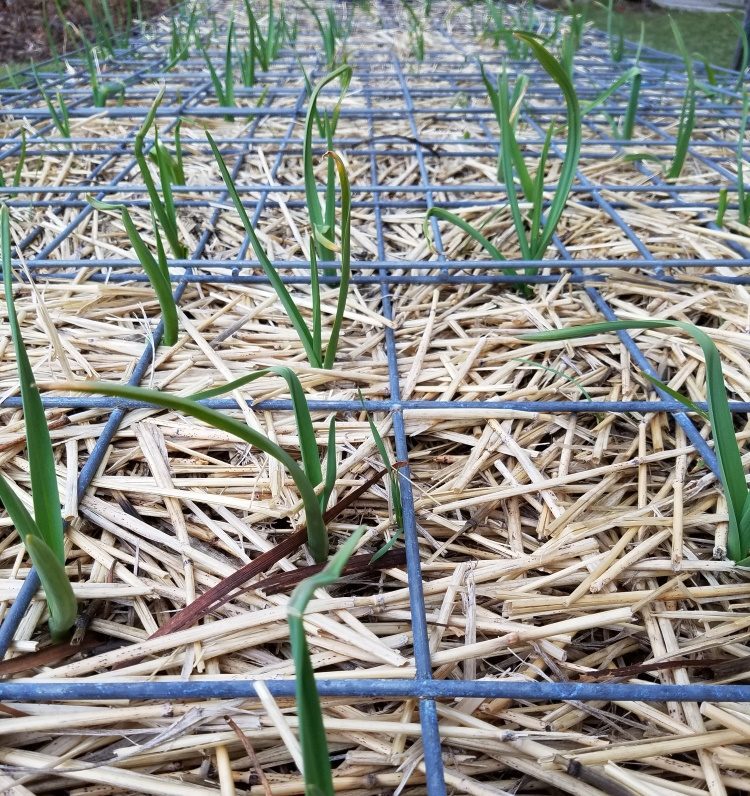
Water thoroughly, then cover the growing bed with a thick 3-to-4-inch layer of mulch, such as straw, pine needles, or leaves. Mulching protects the garlic and helps prevent frost heaves over the winter. To keep the mulch in place, I lay a cattle panel or a piece of plastic mesh fencing (similar to snow fencing only it’s green not orange) on top of the bed. This also keeps critters like cats and squirrels from digging in the beds. Then you’re done until spring!
When spring arrives, remove about half of the mulch to allow the young garlic sprouts to push through the soil. To produce plump bulbs, water garlic thoroughly throughout the growing season.
Garlic is a great companion plant for many vegetables, but as you plan your spring and summer garden, avoid planting peas, beans, asparagus, and parsley next to garlic as it can stunt the growth of these vegetables.
Harvesting Garlic
Garlic planted in the fall is harvested in the following spring or summer. But how can you tell exactly when to harvest if the garlic bulb that is growing underground?
Generally, it will take 8 to 9 months from the fall planting date for garlic cloves to mature into bulbs. Other factors that can affect harvest times are the weather and the type of garlic planted. It’s important to know if the garlic is an early, mid- or late-season maturing variety.
The best way to tell when garlic is ready to harvest is to check if the lower leaves on the plant have turned brown. At this point, I usually do a test dig on one or two plants to see if they are ready for harvest.
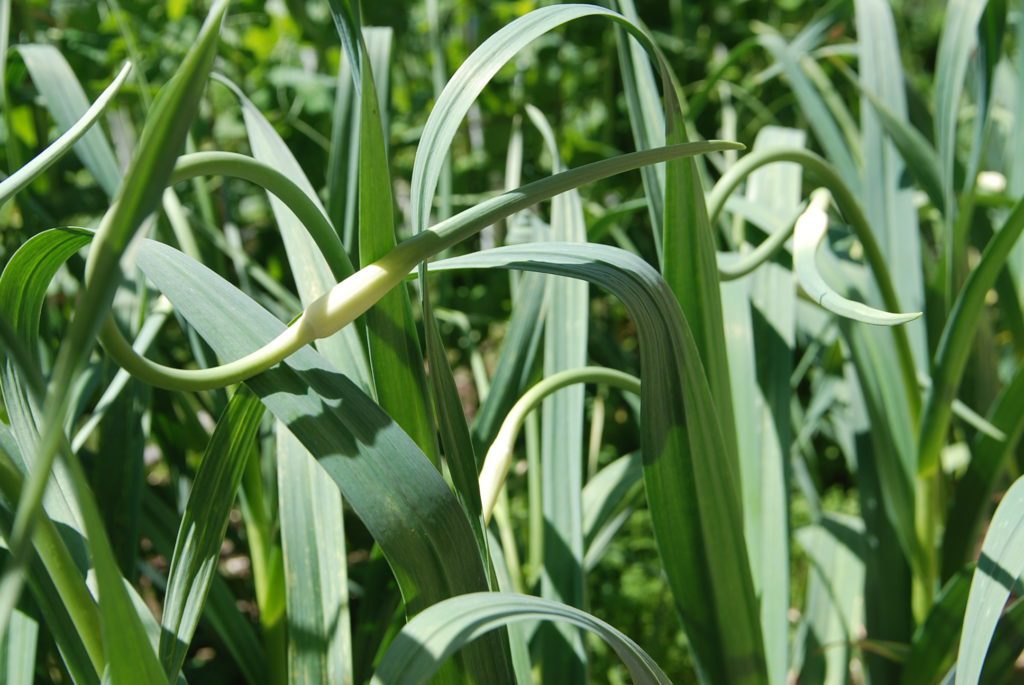
For hardneck garlic varieties, harvest time can be gauged by noting when the garlic scape appears – which is usually 4 to 6 weeks before the bulb matures. After cutting scapes, wait another month and then test dig a few plants to see how they look.
The How-to’s of Garlic Harvesting
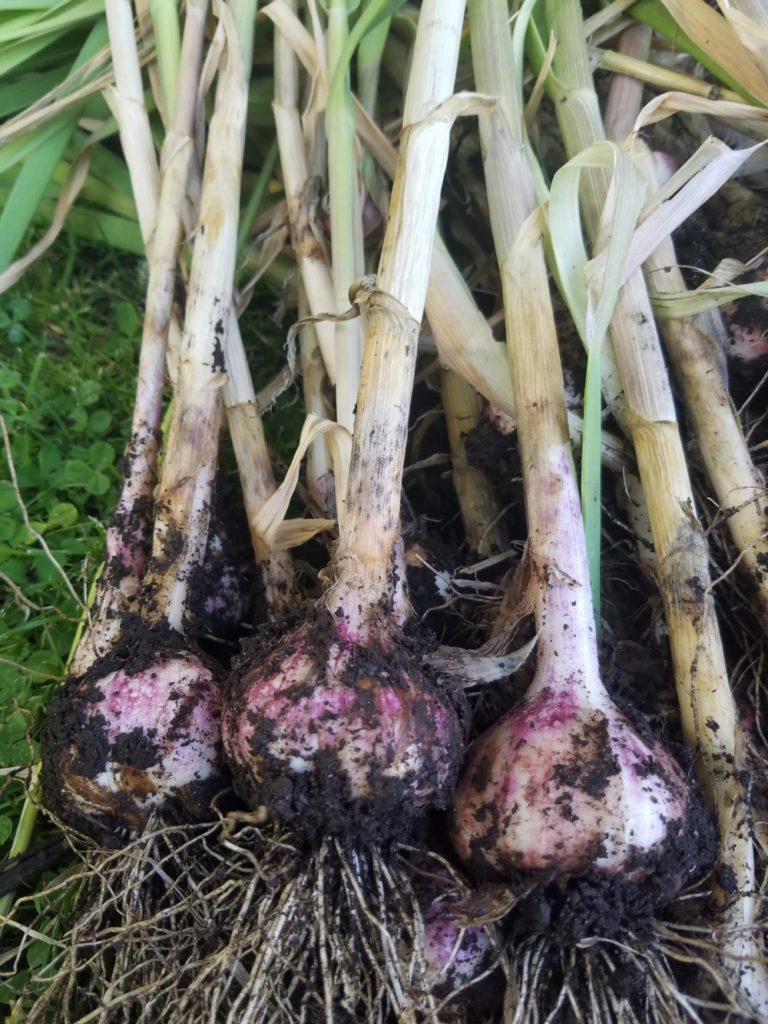
About a week before harvesting, stop watering your garlic. This will make digging and harvesting your garlic much easier and cleaner. From experience, I can attest that you don’t want globs of soil sticking to your garlic at harvest time!
While garlic is part of the onion family, it is not harvested like onions.
- Onions are ready to harvest when their tops have dried and flopped over, but if you wait until then to harvest garlic, the bulbs will have split open underground, greatly reducing the garlic’s quality and storage time.
- Onions can be “pulled” from the soil and often pop right out, but garlic is deeply rooted and therefore it should only be dug out.
- Onions are left in the planting beds to cure in the warm sun, however, garlic will turn bitter if left to cure in sunlight.
Please, don’t harvest your garlic like onions!
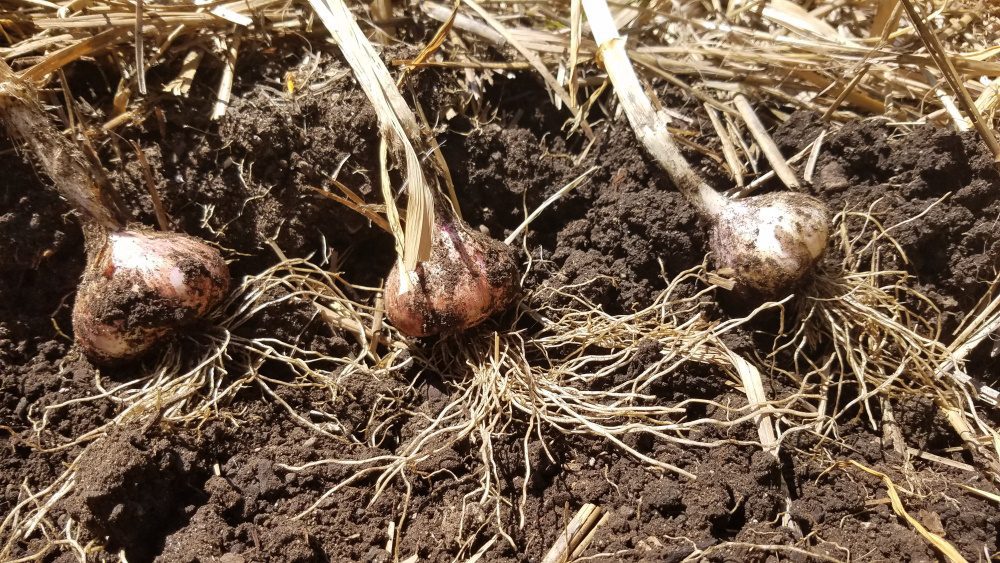
When you decide it’s time to harvest your garlic, begin by digging and gently lifting the soil around the base of the plant. To avoid damaging the bulb, dig at least 4 inches from the base. If you’ve stopped watering, the soil should be dry and crumbly. Hold the garlic at the base and gently pull; the bulb should release from the soil. Gently shake to remove any loose soil and remove the bulb from sunlight as quickly as possible.
Do not wash your garlic! Added moisture can cause fungus growth – there is no need to wash – just let the bulbs air dry away from sunlight for 3 to 4 weeks (depending on weather conditions).
Freshly harvested garlic is ready to use as soon as it’s out of the ground. But for storing purposes, it needs to be cured. Garlic can be bundled in small groups and hung in a garage or shed or placed in a single layer on drying racks. I cure my garlic in mesh grow trays on wire racks. No matter how you choose to cure it, make certain it is out of direct sunlight and there is good air circulation.
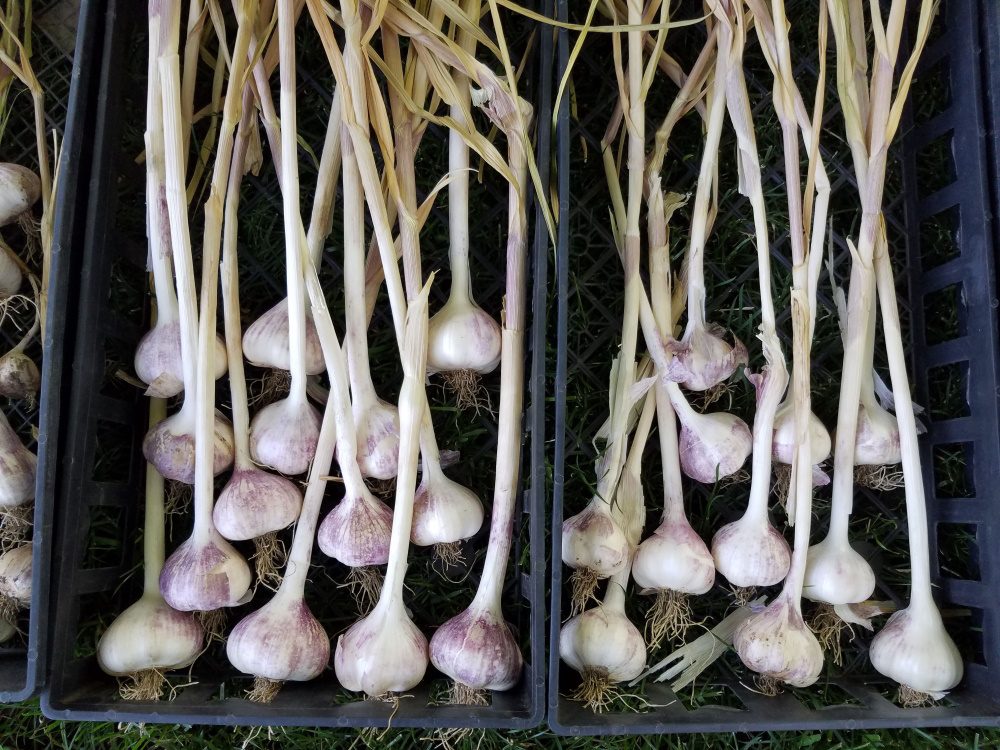
I start cleaning my garlic after it’s been drying for about a week–first by trimming back the dried roots to about ¼ inch, and lightly brushing any soil from the paper wrappers. Once all the leaves are dry (two to three weeks), you can trim the stalk down to about one inch and gently remove any loose paper skins. Emphasis on loose skins – don’t remove too many and expose the clove!
You can also braid softneck garlic and hang it up to cure. Unfortunately, I can’t provide instruction on how to do this, as I’ve not mastered the skill. You’d think with all the horse manes I’ve braided over the years it would come easy – but no. Thankfully, you can find informative tutorials online – good luck!
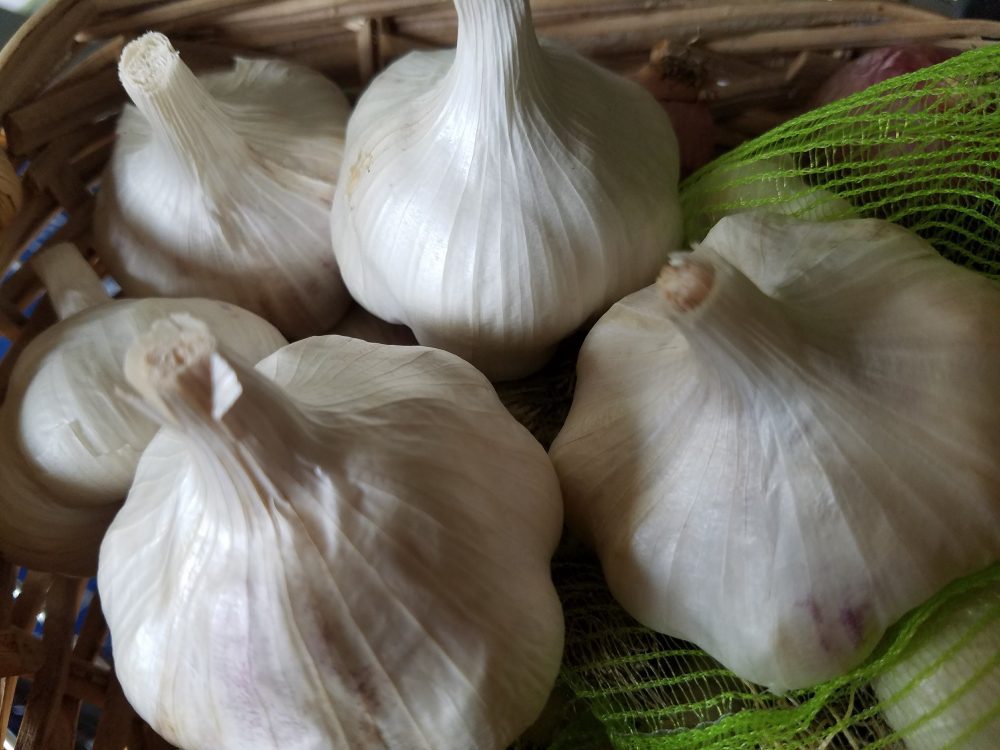
Store garlic in a cool, dark location in wire baskets or mesh bags. Again, the key is to have dry conditions with good air circulation. One of my favorite garlic-harvesting chores is to sort out the best and biggest garlic bulbs for replanting later in the fall. These garlic bulbs are stored separately from the culinary garlic – I don’t want any hungry cooks grabbing my prized seed garlic for pesto!!
Where to Find Seed Garlic
If this is your first year growing garlic, you can often purchase seed garlic at your local Farmers’ Market in the fall or order it online from seed companies. When I buy seed garlic online, I prefer to order from growers in my region — that way I know the garlic will do well in my growing climate. After your first harvest, you can save out the best bulbs to replant the following fall to continue your crop.
It’s magical how one small clove turns into a plump, juicy garlic bulb with almost no effort on your part. Plant garlic in your garden this fall and I promise you’ll never want store-bought garlic again!


Candace, is it possible to grow from organic store bought garlic? I am afraid I am too late here in CdA to find any seed garlic.
Hi Mary,
Try Mountain Valley Garlic and Snake River Seed Co-Op (google for websites). They both recently had garlic. Regarding store-bought — often this garlic is sprayed with a sprouting inhibitor, so it’s iffy. If you can find organic garlic, you might have a better chance. Also, what you find in the stores is softneck and is probably grown in CA or China — not really acclimated to our climate!
Thank you so much for the garlic information!
Can’t wait to try growing it.
Hi Judy, I’m glad you found the article helpful. I can tell you that there is nothing like homegrown garlic. You’ll never want to buy it from the grocery store again after you taste it from your garden! — Candace