Spring is such a fickle time of year in north Idaho. One day we are basking in delightfully warm 70 degree temperatures; a tempting taste of the summer to come. The next day we are greeted with hail, a whipping wind, and 45 degrees. While these swings in temperature rarely faze cool weather crops like peas or spinach, it can spell total disaster for the sun loving tomatoes.
Here are a couple of tomato planting tips to get your tomato transplants off to a good start.
Before Planting
Make certain your plants are hardened off. This is the process of getting young plants acclimated to the great outdoors. If you’ve purchased from reputable nursery or local grower they will most likely have been hardened – but it’s always a good idea to ask.
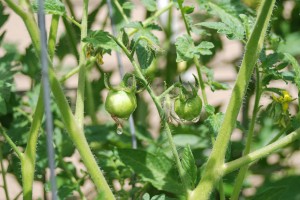
Make sure your plants have been hardened off. This include any large plants — even those bearing fruit.
If you’re purchasing from Costco or any location where the plants have been kept indoors, you’ll probably need to harden the plants to get the used to something other than the constant 70 degree temperature they’ve been living in 24/7.
Here’s how: Each day for at least a week, set your plants outside in a protected area – out of direct sun and wind. Sun can quickly burn young plants (even those big ones found at Costco) and wind can wither plants very quickly. A location with dappled shade is best. Leave them out for about 30 minutes the first day and increase the time and light intensity each day until they are out all day and in full sun. If the weather is particularly nasty – cold, windy, or pouring rain, it’s best to skip that day and leave your plants in the garage.
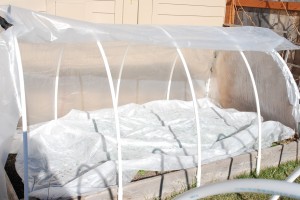
Cool weather still prevails into June. Have frost protection at the ready like a floating row cover to protect plants.
Keep an eye on the weather forecast. We are past our last average day of frost (May 15th), but Mother Nature has been known to toss a few hail balls our way well into June (or July!). Therefore, it’s critical to have frost protection at the ready for chilly days and nights. Items like a floating row cover, cloches, or even plastic milk jugs can raise the temperature around plants just enough to keep them from freezing. Hopefully you won’t need to employ these items, but have them ready just in case.
Planting Time
Tomatoes need warmth to survive. That means warm air temperatures and warm soil. I don’t plant until the overnight temperatures are consistently 50 degrees or more. For the most part we are achieving that and my plants have been in for a few weeks due to their protected growing environment next to a south facing garage wall.
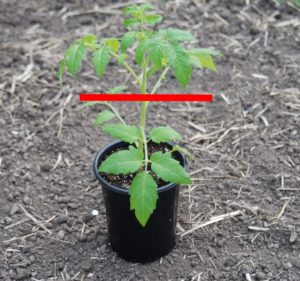
Plant tomatoes deep in the ground. About two-thirds of the plant should be in the ground — that’s everything below the red line. Pinch or cut off stems.
Into the deep. Tomatoes want to be planted deep – whether planting in the ground or in a container. By deep, I mean approximately two-thirds of the stem goes in the ground (or container) and one third is above the soil (see image right). And yes, that pertains to any size transplant. Why so deep? Because tomatoes will grow roots all along their stems, so planting them deep ensures good root development, more roots to take up nutrients, and a stronger plant. Remove the lower two-third stems by pinching or cutting the stems off. Be careful not to tear them from the main stem.
Dig a deep hole about twice as wide as the container they were grown in. You don’t need to add any amendments or fertilizer to the planting hole. Loosen the roots and gently place your tomato in the ground (or container). About one-third of the plant should be above ground. Back fill and lightly press the soil around the stem to remove air pockets.
If you are growing in a container, make certain your vessel is at least 12 inches deep – that is the minimum depth for tomatoes. A container that is 18 inches or deeper, is best.
Can’t go deep? If your tomato transplants are leggy (tall and thin) or you can’t dig a deep enough hole, you can plant in the “L” or trench method. Dig an oval hole as deep as possible and lay the roots and two-thirds of the stem on its side, while gently bending the remaining one-third of the stem upward. Back fill the hole and proceed as above. This method is just as effective, but I don’t like it since there is a greater chance of breaking the stem while bending it upward.
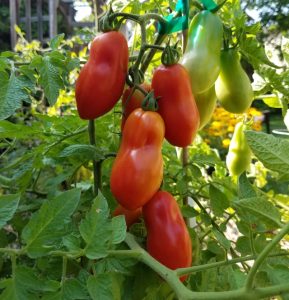
Feed tomatoes with a slow release, organic fertilizer, such as fish emulsion, for a bountiful harvest.
The care, watering, and feeding of tomatoes. After planting, top-dress around the plant with an inch or two of rich compost and then water slowly and deeply. Finally, cover the area around the plant with at least a two-inch layer of mulch to keep weeds down and moisture retention up. The mulch layer can be straw, dried grass clippings, or bagged “red” mulch.
Feed your transplants with a slow-release, organic fertilizer or use fish emulsion about once a month. Make sure to read and follow instructions on the fertilizer label. Water slowly and deeply, about one to two inches per week. This promotes deep roots and strong, thriving plants.
Tomatoes grown in containers will need to be fertilized and watered much more frequently than those grown in the ground. During the heat of summer you may find yourself watering the container twice a day. Again, read and follow fertilizing instructions specifically for container growing for the best results.
Your newly planted tomatoes will begin to “green up” and show signs of new growth in just a few days after planting. Continue to love your tomatoes and they will love you back with a bounty of juicy, homegrown goodness later this summer!


Leave a Reply