Just because the calendar says “fall” doesn’t mean that the gardening season has to come to an end. On the contrary, there are several ways to extend your growing season through the fall months, into winter, and perhaps right through spring. Now that is really extending the growing season!
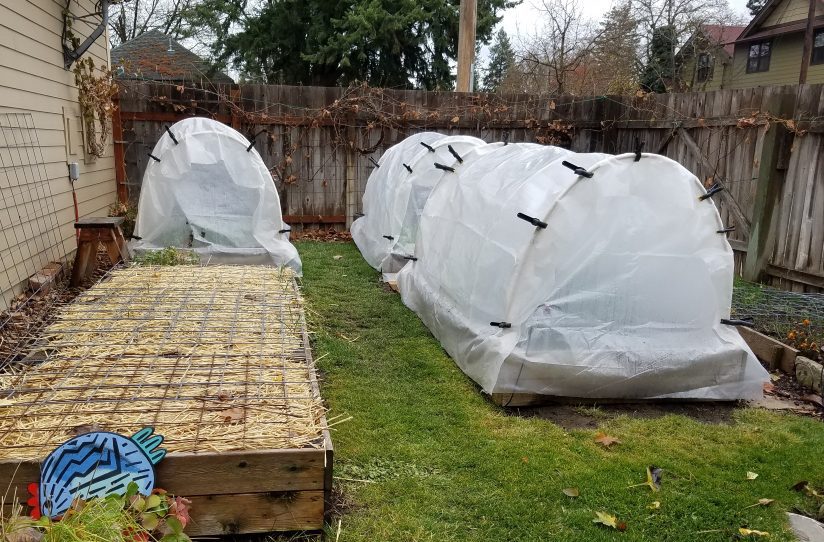
Many hardy, cool-season vegetable crops, like spinach, kale, and carrots can withstand a light frost in the fall and actually taste sweeter after a touch of frost. However, to keep those crops growing as long as possible, you’ll need to add some protection from hard frosts and colder temperatures.
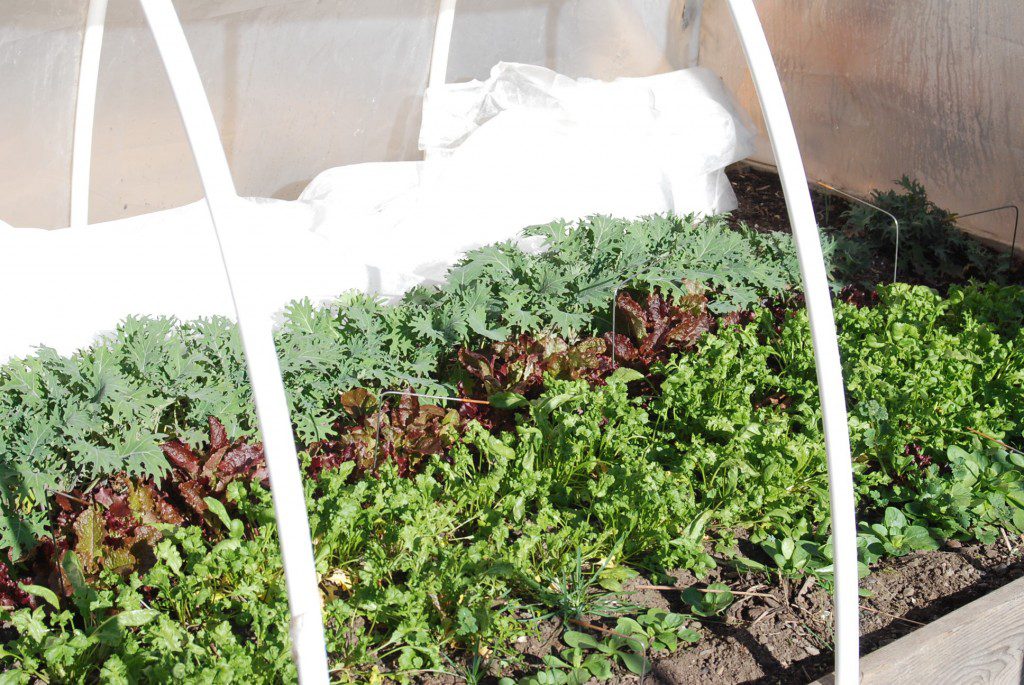
There are various ways to protect your plants from the elements, such as applying a thick layer of mulch around tender plants or covering them with cloches and floating row covers. If you live in a temperate climate, this may be all that’s needed to protect your fall crops and keep them growing into winter.
Two reasonably inexpensive ways to protect vegetable crops and extend the growing season well into fall and beyond is to use floating row covers and low tunnels. These methods are particularly well-suited for gardeners in the northern climates.
Both provide greater frost protection than just using mulch alone, and they will keep your plants safe through multiple frosts. When you use row covers and low tunnels together, you might even be able to grow all throughout the winter months and on into spring – yes, even in northern climates!
Floating Row Covers
Floating row covers are made from a lightweight spun polyester or polypropylene fabric that does triple duty in protecting your plants from sun, insect, and frost damage.
These row covers can protect tender plants from too much sun early in the season and also provide needed shade for emerging cool-season crops in the fall. They can also provide a barrier to protect plants from insect pests, such as leaf miners.
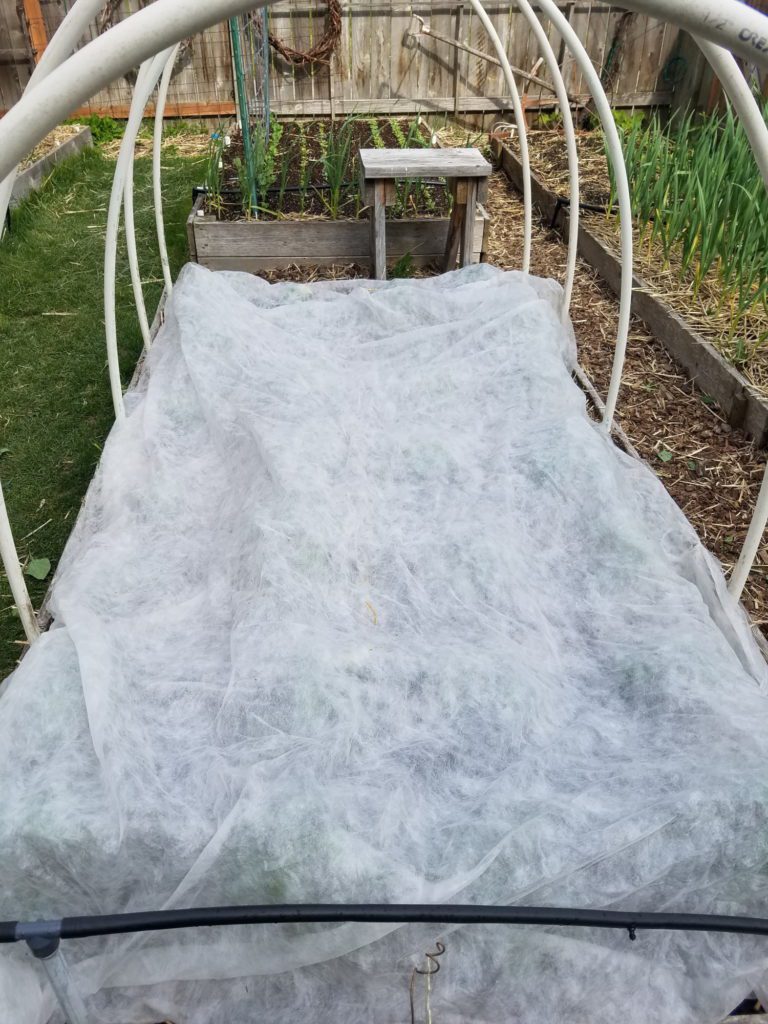
Row covers also excel at frost protection. In a pinch, it’s perfectly fine to use a bedsheet or other type of cloth to protect your plants, but if you are planning to grow throughout the fall, you’ll want to invest in row covers because, unlike other cloth, they are permeable to light, air, and water.
Since row-cover fabric is lightweight and breathable, it can be placed directly on top of plants, like a blanket, or it can be suspended over the plants with hoops or supports. The ends of the row cover are gathered and tied off and sides are anchored to the ground with stakes, bricks, or sandbags.
Row covers come in various lengths and widths as well as varying levels of frost protection depending on the fabric weight. Row covers can give you that extra degree or two of warmth to save your plants from frost damage. The covers hold in heat collected during the day and this added warmth will protect your plants from ward off frost during the night.
Row covers are an indispensable part of my garden. I use them in the fall and spring to protect young seedlings, and I use them as an early sun shade during the hardening off of vegetable starts. They are durable and will last you several seasons – I think you’ll find they are worth the investment.
Low Tunnels
Low tunnels, also known as hoop houses, will extend your ability to grow on both ends of the season –growing for longer periods in the fall and starting your garden earlier in the spring. The tunnel structure can be covered with floating row fabric or a thick-mil clear plastic sheeting.
A low tunnel covered with clear plastic essentially creates a mini-greenhouse environment for your planting beds. When the plants growing in the low tunnels are well-mulched, then covered with a floating row cover that sits inside the tunnel, it is entirely possible to grow throughout the winter months and on into spring.
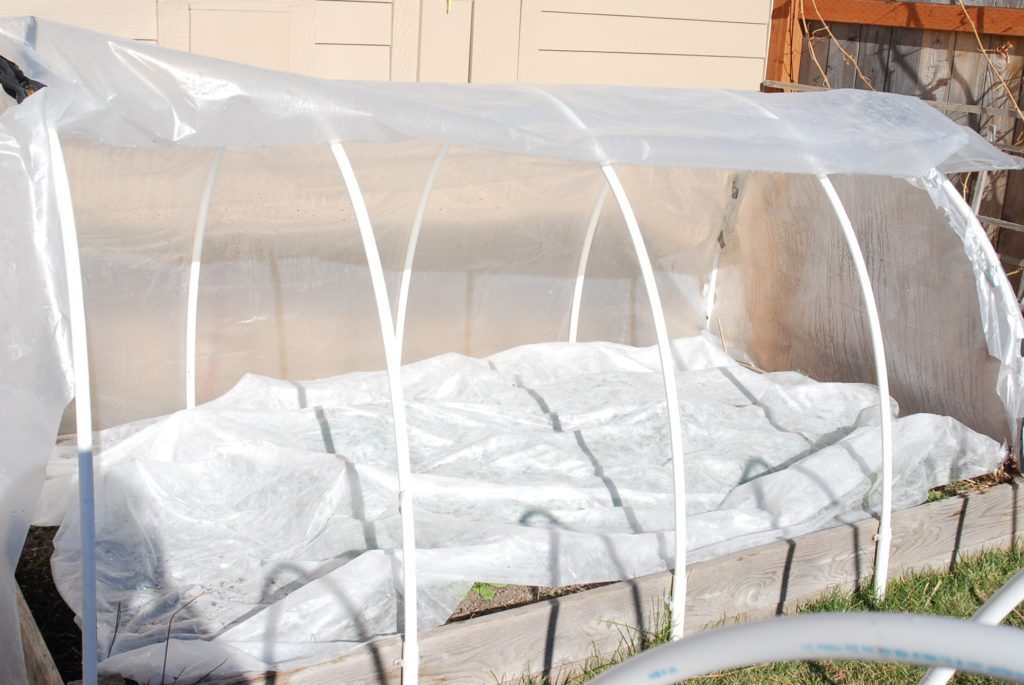
The added protection of a low tunnel allows you to harvest a crop of hardy greens, such as kale, chard, and spinach before winter sets in and also allows these plants to overwinter in a snug low-tunnel environment. Many cool-season crops will survive the winter in a dormant state and begin to grow again as daylight increases in late winter — thus extending your spring growing season. You’ll be enjoying a wonderful crop of greens in late February or March!
Even if you don’t grow a fall crop, a low tunnel can effectively heat up the soil for early spring planting. In the years when I don’t plant a fall garden, I install low tunnels in early February, sometimes even setting them up over beds still covered in snow. Within a week or so, the snow has melted away and the beds are well-watered and the soil has begun to warm up nicely.
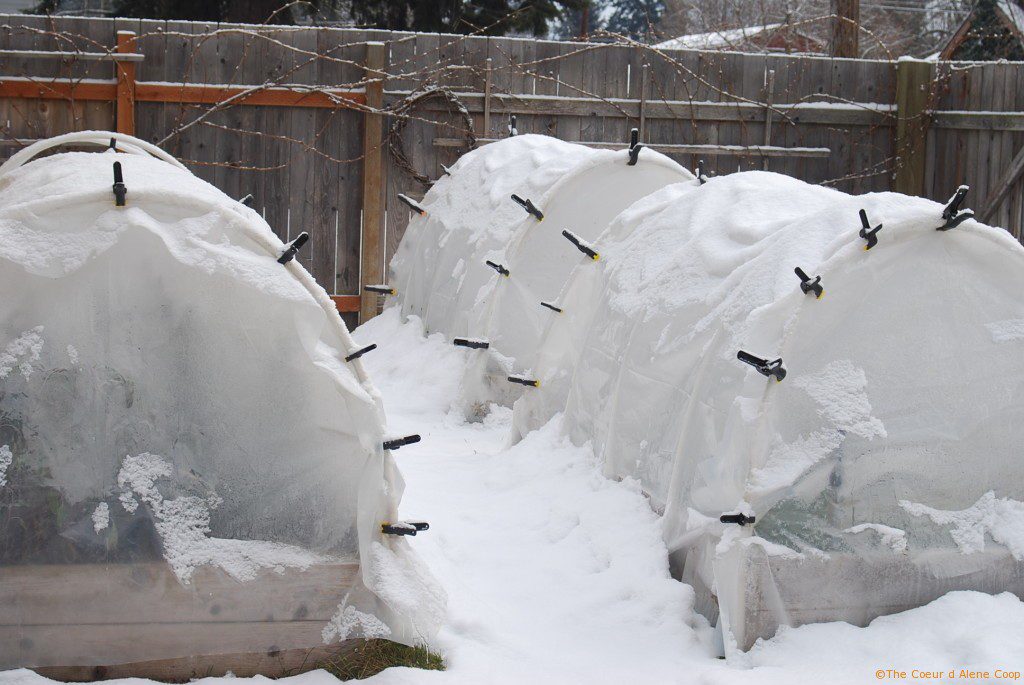
Both provide greater frost protection than just using mulch alone, and they will keep your plants safe through multiple frosts. When you use row covers and low tunnels together, you might even be able to grow all throughout the winter months and on into spring – yes, even in northern climates!
How to Construct a Low Tunnel
Low tunnels are fairly simple to construct using PVC pipe, thick-mil plastic sheeting, or floating row-cover material. The supplies listed below are for a single low tunnel that will cover a 4 ft by 8ft raised bed. This is a basic tunnel structure that has served me very well over the last 12 years.
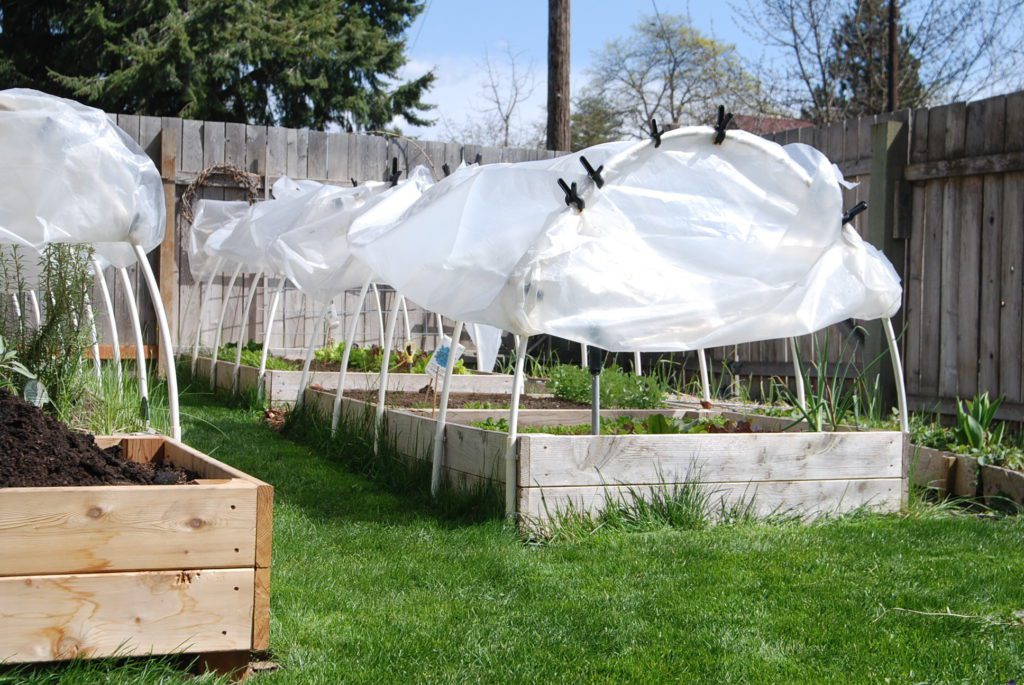
Materials List for a 4 x 8 Raised Bed Low Tunnel
- Five 10-foot lengths of ½ inch PVC pipe (hoop supports)
- Ten 12-inch pieces of ¾ inch PVC pipe OR ten 18-inch pieces of rebar (ground supports)
- Clear plastic sheeting: 6 mil construction grade or greenhouse grade (better durability but more costly), 10 ft wide by 10 ft long (or a length to provide at least a foot overhang on each end); or Agribon-19 Floating Row Cover, 10 foot wide by length of your choice
- Spring clamps (at least 10) to hold plastic in place
- Optional: garden stakes, staples, sandbags, or bricks to anchor the tunnel sides
For overwintering, I recommend using clear plastic sheeting to cover the beds. Floating row cover material is perfect as a secondary layer under the plastic or a single layer for frost protection, but will not withstand snow-loads like the plastic sheeting will.
Constructing the Tunnel Frame
- To avoid the PVC ground supports filling with soil, place a piece of duct tape over one end before inserting it into the soil.
- The ground support pipes (or rebar) are inserted into the soil inside the raised bed. Working along the long side of the bed, use a rubber mallet to hammer a ground support pipe into the corner of the bed until it is even with the side of the raised bed frame.
- For rebar ground supports, hammer the rebar into the soil until it is 8 inches higher than the side of the raised bed frame.
- Continue working down the long side inserting the 4 remaining supports at 2-foot intervals. Repeat on the opposite side of the bed. You will have 5 pair of supports, spaced 2 feet apart on both sides of the bed.
- Insert the 10-foot-long PVC pipe inside the PVC ground support pipe or conversely, slide the pipe over the rebar ground support.
- Gently bend the long PVC pipe across the raised bed and insert it into the PVC support pipe on the other side or slide it over the rebar ground support located there.
- Repeat this process with the remaining 4 pairs of ground supports.
NOTE: Some photos in the post show the tunnel ground supports attached to the outside of the raised beds. We started out this way, but eventually moved the supports inside the bed. Unfortunately, the lawnmower wheels got caught on the brackets — or my ankles would! If you have room to maneuver, this is an alternate method to attach the ground supports, but I prefer them inside the beds.
Attaching the Plastic Sheeting
- Cut the plastic sheeting to length and include enough for an overhang on each end of the tunnel. For an 8-foot bed, I recommend a foot of additional sheeting for the overhang.
- Cut two 6-foot x 6-foot pieces of the plastic sheeting to cover each end of the tunnel.
- Attach these pieces to the arched support hoops on each end of the tunnel using spring clamps. If you wish, you can cut the end pieces into an arch shape to match the tunnel openings.
- Drape the longer length of plastic sheeting over the hoop structure and attach it to the arched hoop on each end of the tunnel with spring clamps.
- Adjust the plastic if needed, then pull it tight, and clamp it to the hoops again.
- You can place sandbags or bricks on the edge of the plastic sheeting along the sides of the raised bed frame to keep the plastic in place.
- The plastic sheeting on the sides of the tunnel or at the ends can be folded back or rolled up to provide ventilation.
My tunnels are not fancy, but they are very efficient in protecting my crops in the fall and the spring. Of course there are many other methods to construct a low tunnel – but this design is simple and a very cost-effective way to keep your plants growing throughout the fall!
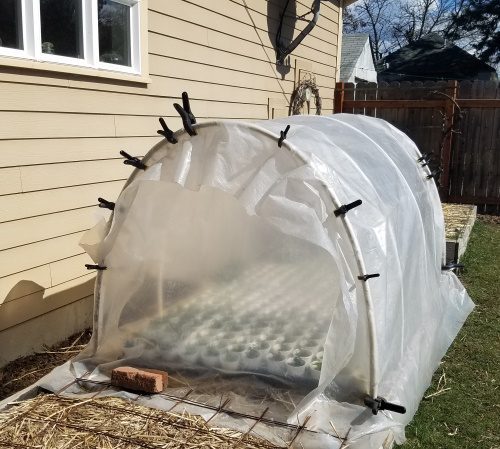


This is only my second winter with properly-made low tunnels, but the first essay worked so well that I wanted to invest more effort and money into the method.
To set the pipes into the ground, first I make entrance holes 10” deep, at 4’ spacing, along the length of, and inside, the bed frames. Holes are made by pounding a 1” galvanized pipe 10” into the soil with a sledgehammer.
The ½” x 10’ PVC pipes slide into these holes. Last year (first trial) we spaced hoops at 5’ distance. A really heavy snow collapsed several hoops, so this year we used a 4’ spacing.
Because the pounding of galvanized pipe, and then whacking the pipe to empty it before making the next hole–even much more of a pain than making the hole itself—was such hard work, I decided this year to make those holes permanent. I bought 1” x 10’ PVC and cut each into 10” lengths. These slip into the holes, making sleeves for the hoop-pipes. I also bought pipe caps to cover the sleeves when I dismantle the tunnel. My intention is to set up all the beds with these sleeves, so any bed is ready at any time to become a low tunnel.
I have two layers of 4 degree frost blanket covering the hoops; and when temps really sank in Christmas week, covered them with 6 mil greenhouse plastic. This morning at 10 a.m., admittedly a sunny morning, the temperature was 18 F, but inside the tunnel, 54F.
Sounds like a great plan! Your “new” version is what we do — PVC pipes that are larger in diameter than the hoop PVC are driven into the soil and hoops slide into these. Our spacing is a bit closer together — about 2 feet and rarely have issues with snow load. Glad you are enjoying winter gardening!
Thank you for sharing!! These may be very newbie questions but I would love your advise. When you cover the hoop garden with 6mil plastic in the month of February, do you ever start directly or simply use the house as a “greenhouse” and start your seeds in conditioner inside if it? Also with the hoop method do you wait until the last frost (mid-May for me) to start those seeds? Thanks again for your help!
Hi, The point of using a hoop/low tunnel in the late winter is to melt any remaining snow on the bed and begin to warm the soil. This will allow for earlier planting (either direct seeding or transplants) for cool season crops like peas, greens/lettuces, spinach, broccoli and such. You can direct sow peas in late March/early April in a low tunnel as well as set out transplants. Cool-season vegetables that were started indoors can be hardened off in a low tunnel before planting. I recommend starting seeds indoors or purchasing cool season crop transplants. Any warm season crops should also be started indoors but not planted until after May 15th or later. Hope this helps! — Candace